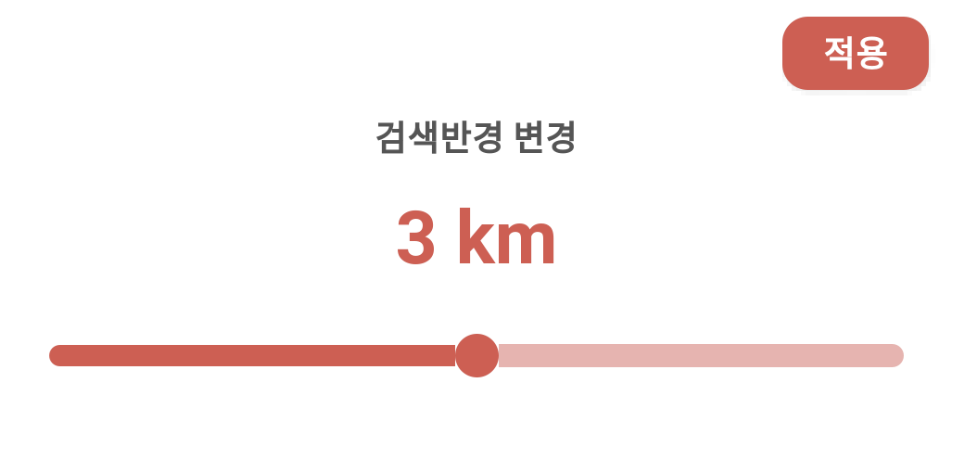
1. SeekBar를 커스터마이징 하자
- SeekBar의 선을 나타내는 progressDrawable, 둥근 커서를 나타내는 thumb가 있는데 각각 커스터마이징 할 수 있다.
1) SeekBar 배경설정
<SeekBar
  android:id="@+id/sb_storemainoptiondistance_distance"
  android:thumb="@drawable/seekbar_thumb"
  android:progressDrawable="@drawable/seekbar"
  android:max="4"
  android:progress="2"
  android:layout_marginBottom="50dp"
  android:layout_width="match_parent"
  android:layout_height="wrap_content"/>
2) seekbar.xml
- 여기에서 핵심 원리: 여기서 따로 height를 조정할 수 없기 때문에 안에 들어가는 drawable에서 커스터마이징한다.
<?xml version="1.0" encoding="utf-8"?>
<layer-list xmlns:android="http://schemas.android.com/apk/res/android">
    <item
        android:id="@android:id/background"
        android:drawable="@drawable/bg_appcolorwhite_radius"/>
    <item android:id="@android:id/progress">
        <scale
            android:drawable="@drawable/bg_appcolor_radius"
            android:scaleHeight="10%"
            android:scaleWidth="100%" />
    </item>
</layer-list>
2-2) bg_appcolorwhite_radius.xml
- 배경을 원하는 색으로하고 선의 두께를 두껍게하고 흰색으로 칠해서 선이 얇아보이게 한다.
<?xml version="1.0" encoding="utf-8"?>
<selector xmlns:android="http://schemas.android.com/apk/res/android">
    <item >
        <shape android:shape="rectangle">
            <corners android:radius="10dp"/>
            <solid android:color="@color/appColor"/>
            <stroke android:color="#fff" android:width="4dp"/>
        </shape>
    </item>
</selector>
3) seek_tumb.xml
- tumb는 원하는 크기대로 설정할 수 있기 때문에 간단하게 아래와 같이 설정해준다.
<?xml version="1.0" encoding="utf-8"?>
<!-- 원모양의 시크바 컨트롤러 -->
<shape xmlns:android="http://schemas.android.com/apk/res/android"
    android:shape="oval"
    android:useLevel="false"  >
    <!-- 배경 -->
    <solid
        android:color="@color/appColor"/>
    <!-- 테두리 -->
    <stroke
        android:width="2dp"
        android:color="@color/appColor" />
    <!-- 크기 -->
    <size
        android:width="18dp"
        android:height="18dp"/>
</shape>
